Wednesday, November 2, 2011

Green Tomato Pickles

This year, like last year, we cultivated a garden. And this year, like last year, our tomatoes really didn’t take off until August. The plants produced a bunch of tomatoes, but most of them were still green last week when we pulled up the plants to clean out the garden. I knew there had to be ways to use the green tomatoes (other than fried green ones, that recipe is coming), so I did some internet searching. I found two recipes that were promising. One was a pickle recipe and one was a jam recipe. I had never done anything like these before, but they were quite fun to make.

The pickles I made last year took on a strong vinegar taste after about 3 months. This time I reduced the vinegar and replaced it with water. We’ll see if that works all right. I’ll let you know.

Green Tomato Pickles
  • 5 lbs green tomatoes, stemmed and quartered
  • 2  cups vinegar
  • 3 cups water
  • 7 1/2 teaspoons pickling salt
  • 10 teaspoons of dill seed, or 5-6 dill heads
  • 10 garlic cloves
  • 1 1/4 teaspoons whole peppercorns
  • 5 bay leaves

Prepare your jars.

Combine the vinegar, water, and salt, and bring to a boil.

In the bottom of each jar place 2 teaspoons or a head of dill, 2 garlic cloves, 1 bay leave and 1/2 teaspoon peppercorns. Pack the jars with tomatoes, and fill slowly with brine. Use a wooden chopstick to remove air bubbles, and add brine if necessary. Put lids and rings on jars and process in a boiling water canner for 10 minutes.


Enjoy!

Monday, October 31, 2011

Salsa!


Just like a lot of other Americans I like salsa. The tomato-onion-peppers sauce. The music is all right, but I'm more of a classic rock guy. Like a lot of Americans I also have a garden, in which I grow tomatoes, onions, and peppers. Whoa! I bet you can see where I'm going with this. I found recipes on the web through the extension offices of several different states. I have made salsa before when we had a garden and we liked it very much, so since we have a bunch of tomatoes and the onions are in the basement, I thought I would try another batch of salsa.

This is a canning recipe, so if you are new to it, here are a couple of good places to start looking for information.  

One thing that the recipes tell you to do is peel the peppers by roasting them and then peeling them. I don't do this for a couple of reasons. 1) I'm lazy. 2)It seems like a lot of work for primarily an aesthetic thing. I know, you'll get these little transparent pieces of skin in your teeth occasionally, but I really don't care about that. If you do, then fire-roast your peppers.

Salsa
  • 7 quarts of paste tomatoes (about 11 pounds); peeled, cored, and chopped
  • 4 cups of peppers seeded and chopped (Use the heat that you desire)
  • 5 cups of onion, chopped
  • 1/2 cup jalapeno peppers, cored and diced
  • 6 cloves of garlic, minced
  • 2 cups lemon or lime juice
  • 2 tablespoons of salt (I use pickling salt)
  • 1/2 tablespoon black pepper
  • 2 tablespoons ground cumin
  • 3 tablespoons dried oregano
  • 2 Tablespoons fresh cilantro, finely minced
Wash and peel the tomatoes. Like peaches, you can drop them in boiling water for 30-60 seconds, then dip in cold water and their skins should come off. Wash and prepare onions, peppers, and garlic.  Put all ingredients except cumin, oregano, and cilantro in a large kettle and bring to a boil.

If you used paste tomatoes (like Roma) you probably can get by simmering for about 20 minutes to a half hour. I didn't have enough of those, so my tomatoes were juicier than paste tomatoes. I let it cook down about an hour or so because I hate watery salsa. Add the cumin, oregano, and cilantro for the last 20 minutes or so.


Then, prepare your jars and lids, fire up your water-bath canner (which you should have had warming up for awhile), and put the salsa in jars. Process in boiling water for a time appropriate to your altitude. It's usually 20 minutes where I'm at in Wyoming. Enjoy!

Sunday, October 23, 2011

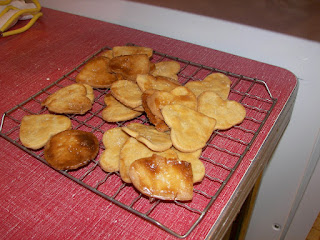
Butter Crackers


With Samantha and Dona's diets being limited in the types of grains and other things that they can have sometimes they begin to miss some of the foods that many people take for granted. I was casting around for some different kinds of recipes and came across a recipe for homemade crackers. I'm sure many folks would say, "Why would you make your own crackers? The store has boxes and boxes of them!" Well, you're right, but there aren't really many gluten-free options when it comes to crackers like these. Try finding crackers without any flours from grains, and you've either created a huge headache for yourself, or you've found some expensive crackers!

Butter Crackers
  • 1/2 cup (65 grams) tapioca starch (the original recipe does much of this by weight. I'm using volume measures in case you don't have a scale.)
  • 1/2 cup (80 grams)brown rice flour
  • 1/4 cup garbanzo bean flour
  • 1/2 teaspoon sea salt or other coarse salt
  • 1/4 cup cold butter, cut into small pieces
  • 1 Tablespoon Agave Nectar
  • 1/4 cup, plus 1 tablespoon mimiccreme
  • 1 egg yolk beaten with one tablespoon mimicreme
Line a baking sheet/cookie sheet with parchment paper.

Mix the flours and salt together. Add the butter and cut it in using a fork. The mixture should look like coarse flour or corn meal. Add the agave to the mimicreme and stir.

You might need some help for this next step. Start stirring and slowly pour in the cream mixture, pausing to stir and allow the flour to absorb the liquid. Keep stirring and add all of the cream, SLOWLY. The mixture should just come together. It should hold together if you squeeze it into a ball in your hand. Think pie crust. At least that's what it seemed like to me.

Now you can get out your rolling pin and some wax paper or parchment paper. The wax/parchment needs to be about 1 foot square. Take about 1/3 or 1/2 of the dough and flatten it out on one piece of the wax paper. Place another piece of wax/parchment paper on top of the dough and start rolling it out. Roll it to 1/8 inch thickness. If the wax paper wrinkles a bit, you can peel it off and put it back down. Then, flip it over and unwrinkle the other side. 


Once you are done, carefully peel back the top layer of wax paper. Using a glass or cookie cutter, cut out rounds and place them on a cookie sheet. Regather your dough, roll it out, and keep cutting until you've used all your dough.


Place the cookie sheet in the freezer for 15 minutes. Preheat your oven to 325 degrees. After 15 minutes, take the cookies out, brush with the egg mixture, and sprinkle each cracker with some salt. Bake 20-25 minutes. If you have more than one baking sheet, make sure you switch the baking sheets and rotate them. Even if you have one baking sheet, you probably should rotate it to avoid any hot spots your oven might have.

Allow your crackers to cool for 5 minutes on the baking sheet and then transfer to a wire rack to cool completely.

Thursday, October 13, 2011

Tomatillo Salsa


This is another post about home canning. See my post on grape jelly for more specific information about some of the process. 

Dona and I signed up for Bountiful Baskets this summer so that we could get more fresh vegetables as well as increase our access to organic vegetables. One of the first baskets we received included a "Mexican bag." I don't remember what other things it included, but I know there were a bunch of tomatillos. I had seen tomatillos before, and I have had tomatillo salsa in the past, but I have never actually tried to make it. Since I had tomatillos, and I didn't know what else to do with them, I decided to try making some salsa. Since I couldn't find any recipes somewhere else, I used one from the food network.

Tomatillo Salsa
  • 1 Large poblano pepper, seeded and chopped
  • 1/2 onion, cut into wedges 
  • 4 cloves garlic
  • 2 1/4 pounds tomatillos,
  • 1/2 teaspoon cumin
  • 1/4 cup lime juice
  • 1 tablespoon white vinegar
  • kosher salt
  • 3 jalapeno peppers
 Husk the tomatillos and cut into quarters. Put them in a blender or food processor and chop them coarsely. Transfer them to a bowl.  


Coarsely chop the pepper and onion. You can do this by hand or with a machine. Put them in a large saucepan or kettle. Add the cumin, lime juice, vinegar, sugar, and 1 tablespoon of salt. Bring to a boil and and allow to reduce slightly. 


Add the tomatillos and jalapenos, cover, and return to a boil.


Once heated,  it will look like this. 


Fill your jars with the mixture, leaving 3/4 inch headspace, seal and process in a boiling water bath canner for the amount of time appropriate for your altitude.

Sunday, October 9, 2011

Pierogis


While my ethnic background is Norwegian,  I enjoy and like to try other ethnic food. Unfortunately, much of the ethnic food from other European countries tends to be made of wheat flour. When I had to quit using grains I started looking around for recipes withe alternative flours, like garbanzo bean flour.  I was looking for something else but accidentally happened upon this recipe for pierogis. The author of the recipe had some limitations that I don't have to address, but it's a good basis for a recipe. 

Pierogis
  • 2 cups gluten-free flour (I use one cup each of garbanzo bean flour and tapioca flour)
  • 2 teaspoons xanthan gum
  • 4 eggs
  • 2 tablespoons butter
  • 1/3 cup milk (you could use rice milk, soy milk, or nut milk)
  • pinch of salt
Mix the dry ingredients together. Add the butter in chunks and cut in with a pastry knife or a fork so that the mixture is like coarse corn meal. Add the eggs and milk and mix until the dough forms a ball. 


Meat Filling
  • 1 pound hamburger, browned and drained
  • 1/2 medium onion (1/2-2/3 cup)
  • 1 stalk celery
Leave a little of the grease from the meat in the pan and saute the onion and celery. Put the meat back in and allow it to warm up. Drain again. 


Making the Pierogis

To roll out the dough, put some dough in between two sheets of plastic wrap that have been sprayed with no-stick spray. Roll out the dough to a quarter-inch. cut out two inch circles and roll the circles to a thickness of one-eighth inch. Put 2-3 teaspoons of meat mixture in the center of the circle. Moisten the edge of the dough with water and fold over. 


The nice thing is that with the plastic wrap on the bottom, you can fold it over and crimp it without it sticking dough to your fingers. 


Once you have a batch made, boil water in a medium or large kettle. Boil the pierogis for 8-10 minutes. Remove from the water, and allow them to cool and dry on a towel. Once cool, you can freeze them. 


The pierogis look different after you boil them. They sure taste good, though! Simply fry them in a tablespoon of butter or oil.


Wednesday, October 5, 2011

Sugar-Free Strawberry Jam


On Sunday I talked about grape jelly. Today it's strawberry jam.

Strawberry Jam
  • 8-10 cups strawberries, washed and hulled
  • 1-2 boxes low sugar pectin (Sure Jell, Ball, MCP, or whatever is available in your area)
  • 1-2 cans apple juice or white grape juice concentrate (100% juice) 
Once your berries are ready, put them in the blender. Depending on how big your blender is, you might have to do it in a couple of batches. Don't puree them, you just want to break them down into small pieces. Of course, this also depends on how you like your strawberry jam. If you like it chunky, just pulse your food processor or blender a couple of times. to get the juice flowing and break up the strawberries.

Once you have this done, put the strawberries in a large stainless steel kettle with 1 box pectin, and bring to a rolling boil. (See the post on Grape Jelly, immediately preceding this one, for other information about home canning.) Add one can of concentrate, return to a boil, and boil for one minute.  Now, taste your concoction to see if it's sweet enough for you. If not, add another can of juice and boil for another minute.

 Once you have it sweet enough, we need to see if the jam will "jell." I wrote about the spoon test last time, but I will repeat it here. Dip a spoon in the jam and place it in the freezer for a minute. (Put it on a plate so that you don't get stuff in the freezer sticky.) Take the spoon out and see how the jam slides off. If it slides off in a sheet, it's ready. I usually just tasted it to see if it was about the right consistency. If it's too soupy, add another half of a box of pectin, boil for another minute, and repeat the spoon test. Once it's the right consistency, you are ready to put it in jars, put the jars in the water bath, and boil away!

*When I made this, I used apple juice concentrate. However, pectin also is made from apple juice, so they might have worked together, because I had a hard time getting it as sweet as I wanted it. Next time, I am going to try white grape juice.

Sunday, October 2, 2011

Grape Jelly


If you have followed this blog at all, you know that Samantha and Dona (daughter and wife) are trying to avoid sugar. As I'm sure you can imagine, a person can have a difficult time trying to find things like condiments that don't contain sugar. We found some jams and jellies that don't use refined sugar, for $6-$8 per jar. So I thought I would see if I could make some that was edible. I will post a strawberry jam recipe here this week that was all right, if a bit tart. This grape jelly, though, is pretty good.

If you have never before done any home canning, I would encourage you to start small and start easy. Hit some yard sales and buy a water bath canner from an old lady who doesn't need it any more. She will probably supply you with some mason jars as well. Jams and jellies are some of the classic things to preserve, as well as things like apple butter.

I found this recipe for jam without sugar. As I noted above, it turned out pretty well.

Grape Jelly
  • 2 containers of frozen grape juice concentrate, thawed
  • 1-2 boxes of low-sugar pectin 
Put one of the containers of grape juice concentrate in a stainless steel or enamel kettle with 1 box of pectin and bring to a rolling boil (one that cannot be stirred away). Add the rest of the grape juice concentrate, return to a rolling boil, and boil for one minute. 

Now you need to test to see if your jelly will "jell." Dip a spoon in the jelly and put it in the freezer for about a minute. 


Take the spoon out and see if the jelly runs, drips, or slides off. If it slides off, you are ready to put your jelly into jars. If not, you need to add more pectin. Add about a half of a box, and boil hard for another minute. Do the spoon test again. It should jell now, but you might need to add another 1/4 to half of a box of pectin. Once your jelly jells, then you are ready to put it into jars. 


I assume you have washed your jars. Once you have the jelly warming up to a boil the first time, put them in a sink of really hot water. You are going to be putting boiling hot liquid in the jars, and the glass might crack if it's not warmed up.  


Also, before you even start the process, put enough water in your canner and turn on the heat to medium or medium-high. Start with hot water out of the faucet if you can, because it will take awhile and a lot of heat to get the 3-5 gallons of water boiling hard. 


Anyway, put your jelly in jars and put lids and rings on the jars. Boil for the amount of time appropriate to the size of jars you are using and your altitude. 


When you are done you have some homemade grape jelly!

Thursday, September 29, 2011

Cream of Mushroom Soup

There are many recipes that call for adding a canned soup to give a dish some body, extra flavor, and the soupy goodness that comes from canned soup. For many years, I have had to make my own cream of mushroom soup because there were no commercial soups that were gluten free. Then Progresso started making cream of mushroom soup, and I was in heaven. I used it in a ton of things: rice hotdish, tater tot hotdish (Okay, mostly I used it in hotdishes, or casseroles, for those of you not from North Dakota or Minnesota). Then we discovered that Dona couldn't have milk; what's a major ingredient in cream of mushroom soup? Milk! So, now I'm making my own soup again.

Cream of Mushroom Soup

  • 1/3 cup soup mix (recipe below)
  • 1 1/4 cups water 
  •  1 small can mushrooms pieces stems or 3-4 mushrooms, chopped
  • 1/4 tsp garlic powder
  • 1/8 tsp celery salt
  • 1/4 tsp onion grains
Mix everything together and bring to a boil, stirring.


Soup Mix
  • 2 cups nonfat dry milk (or lactose free beverage mix; I use soy milk powder)
  • 1 cup corn starch (or potato starch)
  • 2 tablespoons dried onion flakes
  • 1/2 tsp pepper

Sunday, September 25, 2011

Tater Tot Hotdish


For some reason, tater tot hotdish was symbolic to me when I was a kid. It was something I couldn't eat, and symbolized all that was a huge pain about growing up with Celiac Disease (or, as I knew it, Gluten Intolerance). I don't really know why I cared more about it than something else, like bakery doughnuts, or pizza, but tater tot hotdish symbolized all that was wrong with the world. At the time, I couldn't have tater tots because the companies used flour as a coating so that they would crisp up nicely. I think there are some brands that still do use flour as a coating, so MAKE SURE YOU CHECK INGREDIENTS! However, in my area, IGA brand and Lynden Farms brand are gluten free. I haven't checked if Ore Ida brand tater tots are gluten free or not, because the other two brands are cheaper, so those are the ones I usually buy. Anyway, once I noticed that there were gluten free tater tots available I was pretty excited. I still am excited every time I make this hot dish.

Tater Tot Hotdish

  • 1 lb hamburger, browned and drained
  • 1/2 cup chopped onion
  • 1/2 cup bell peppers chopped
  • 1 can spinach, or 1/2 box frozen spinach, drained
  • 1 can cream of mushroom soup
  • 1 cup shredded cheddar cheese

Brown the hamburger, drain it, and layer it in a baking dish or pan


Leave a little of the hamburger grease in your frying pan and cook the onions and peppers until the onions are translucent. Layer these over the hamburger. (I might have more than the amount I told you above. I also was trying to have one side be not onion, because Samantha doesn't like onions.)


Next, layer on the spinach and cheese. I used slices of medium or sharp cheddar this time.


Pour the soup over the top of this and top with tater tots. Bake at 350 for an hour, and you have a fantastic one-dish meal! Next time I'll show you how to make mushroom soup if you can't have any of the pre-made ones.

Monday, May 30, 2011

Tzatziki


After making Greek yogurt, I was ready to make tzatziki. Because I wasn't smart enough to ask my friend for her recipe, I looked around for some recipes and found one. It didn't turn out like my friend's tzatziki, but it isn't bad.

Tzatziki
  • 1 cup Greek yogurt
  • 1 Tablespoon lemon juice
  • 1 clove garlic
  • 1 medium cucumber
  • 1 teaspoon dill seed
  • Salt and pepper to taste

You can make Greek yogurt like I showed you in the previous post. Or maybe you could do it the easy (slacker) way and buy some.

Peel the cucumber and slice it in half lengthwise. Then use a spoon to take the seeds out.


Chop the cucumbers into small pieces.


Then, put the cucumbers in a colander or screen and sprinkle with a teaspoon of salt.


Put this over something so they can drain. I didn't get much water out of the cucumbers, honestly, but I assume that it made some difference. After they have drained, get out your blender or food processor.

In your blender, but the cucumbers, garlic, lemon juice, and dill. Grind them up as best you can, then stir this mix into the yogurt. I mixed in a teaspoon of garlic grains as well, to add some flavor.

Let it stand for at least two hours and enjoy! We used it for chip dip and it was a big hit.


Watch later this week for another tzatziki recipe.

Thursday, May 26, 2011

Greek Yogurt

After a friend gave me some homemade tzatziki, I wanted to try making some myself, and tzatziki starts with Greek yogurt. Most people might be able to buy some Greek yogurt, which is becoming more and more available around here. However, we aren't most people. Milk seems to make Dona feel like she has arthritis, so I thought I would try making some Greek yogurt with non-dairy (soy milk) yogurt. I bought some soy milk yogurt from the health food store and let it drain, just like the the Food Network's recipe for Greek Yogurt explains. One thing that was different was that I didn't get as much liquid out of the non-dairy yogurt as they talk about in other recipes.

This is really easy.

Greek Yogurt
  • 1 cup non-dairy plain yogurt
Place the yogurt in a coffee filter that you have placed in a small strainer. Allow to set in the refrigerator overnight. That's it! Now you are ready to use it in whatever recipe you want.

I'm not at home as I work on these, and I forgot to bring my camera with me. So, I will add some pictures later.

Sunday, May 22, 2011

Creamy Broccoli Risotto


After my success with the sweet potato risotto a couple of weeks ago, I wanted to try some more. I found this recipe for broccoli risotto. We like creamy stuff, so I thought this would be a good option.

Broccoli Risotto
  • 4 Tablespoons Olive Oil, divided
  • 1 clove garlic, minced
  • 2 cups broccoli florets
  • 1 Tablespoon of dried parsley flakes
  • 2 1/3 cups chicken broth, warmed and divided
  • 1/2 small onion
  • 3/4 cup brown rice 
  • 2/3 cup cooking wine, dry white wine, or chicken broth
  • 1/4 cup nut cream (I used mimicreme almond & cashew cream)
  • 2 Tablespoons butter
  • 1/4 cup grated Parmesan cheese

In a skillet, warm 2 tablespoons of oil. Saute the broccoli and garlic until the garlic is soft. Add 1/3 cup of chicken broth and parsley; simmer until the broccoli is tender, about ten minutes. Turn off until the rice is ready.

Heat the remaining 2 tablespoons of oil. Add the onion and cook until the onion is translucent. Add the rice and stir, coating it. Heat 2/3 cup of broth in the microwave and add to the rice.


Stir often, so that it doesn't burn. Simmer until most of the liquid is absorbed. Warm another 1/2 cup of broth and add it to the rice. Keep adding the rest of the broth 1/2 cup at a time, waiting until the liquid is absorbed before adding warm broth to the rice. Cook until the rice is creamy and the rice is tender.

Add the mimicreme, broccoli, butter, and Parmesan cheese. Enjoy!

Wednesday, May 18, 2011

Waffles


Last week was Dona's birthday, and her favorite breakfast is waffles. The waffle recipe I use is pretty good, and we all like it. Whether you put syrup or something else on them, these waffles have nice flavor and are just as good toasted the next day!

Waffles
  • 1/2 cup  tapioca flour
  • 1/2 cup garbanzo bean flour
  • 3/4 cup buckwheat flour
  • 2 teaspoons baking powder
  • 1/2 teaspoon salt
  • 3 eggs, separated
  • 4 tablespoons melted butter, margarine, or oil
  • 1 1/2 cups milk (or 1 1/2 cups water, with 1/4 cup soy milk powder in the dry mix)
Beat the egg whites until stiff and set aside. Mix the dry ingredients together. Beat the egg yolks; add in the melted butter and milk beat to mix. Add in the dry ingredients in thirds, mixing each third in before adding the rest. Once all the dry ingredients are added in, gently fold in the beaten egg whites.


Once this is mixed, add, 1/2 cup at a time, into a waffle iron. Mine takes 4 minutes, but yours might be different.


We topped our waffles with the strawberry filling for the crepes I made for Valentine's Day. Using the same recipe, I also made a blueberry topping. It was good, but I had to add water because the blueberries didn't have as much moisture as the strawberries did.

Wednesday, May 4, 2011

Sweet Potato Risotto


The national tournament was held in Connecticut this year, about 45 minutes outside of New York City. While there, I was able to go to the Risottoria restaurant. They had some of the best food I have ever eaten. After talking to a friend about making risotto, I decided to try it myself.

One ingredient common to most risotto recipes I've looked at is Arborio rice. I'm sure you find this hard to believe, but I didn't find Arborio rice at the store here in Powell. So, I just used long grain brown rice instead. I based this recipe on one for Butternut Squash Risotto I found at Cooks.com.

Sweet Potato Risotto

  • 1 medium sweet potato, or two smaller ones
  • 1 cup Arborio Rice, or long-grain brown rice
  • 3 cups chicken broth, warmed
  • 2 Tablespoons Olive Oil
  • 1/2 onion, chopped
  • 1/2 cup dry white wine or white cooking wine

Peel the sweet potato and cut it into 2-4 chunks. Boil it until soft enough to mash.  Mash it fairly thoroughly with a fork or potato masher. You can see that in the picture at the top.


In another large saucepan heat the oil. Add the onion and cook for 1-2 minutes, until the onion is translucent. Add the rice and cook for five minutes, stirring regularly. Add the wine to the rice and cook until wine is nearly all absorbed. If you are using regular wine, pour yourself a glass.


Stir in a cup of chicken stock and the mashed sweet potatoes. Simmer until the stock is nearly all absorbed. I used powdered chicken stock and water. I boiled a cup of water in the microwave, added the chicken stock, stirred it up, and then added it to the rice. Continue adding a cup or so of chicken stock at a time until the rice is creamy but still firm.


At this point you can serve it as is, and it's pretty good. You might add some cinnamon, cloves, and nutmeg and it will be sort of like rice pudding, which makes it even better.

Saturday, April 30, 2011

Lentil Cauliflower Curry

Lentil Curry is on the right, Mom's Rice Hot Dish is on the left.

Dona is really working at eating healthy right now, and it's really cramping my style. I feel guilty about eating ice cream and anything that isn't healthy. Okay, maybe not that guilty. Anyway, she is eating lots of vegetables. As you know, I'm sure, eating plain vegetables for three weeks can get a little on the boring side. Dona also can eat chicken, fish, lentils, and brown rice. Personally, I'd just kill myself and get it over with. Seriously, though, she has some aches and pains that she thinks are food-related, and if this helps her feel better, then I'm all for it.

Here's the problem: Dona doesn't like vegetables that much. So, I have tried to find some recipes that make vegetables a lot more palatable. This recipe is one of them. It is really good and provides a creamy sauce because the red lentils pretty much dissolve. Of course if you don't like curry, you probably won't like this so much.

Cauliflower & Red Lentil Curry
  • 1/2 cup red lentils
  • 1 small (about 3 inches in diameter) onion, chopped
  • 2 teaspoons curry powder
  • 1/2 teaspoon salt
  • 1/4 teaspoon turmeric
  • 4 plum tomatoes, (or one regular-sized tomato) chopped
  • 4 cups cauliflower florets & stalks
  • 1 teaspoon oil
  • 1 teaspoon cumin seeds
  • 3 cloves garlic, minced
  • 1/2 teaspoon ground ginger
  • 1 tablespoon lemon juice
  • 1 tablespoon fresh (or frozen) cilantro, chopped fine
In a 3-4 quart kettle or saucepan, combine the lentils, onion, curry powder, salt, and turmeric with 2 cups water. Bring to a boil and allow to simmer until the lentils are cooked. This will take 30-45 minutes. You also should start seeing a sauce develop at this time.


Add the tomatoes and cauliflower. You also could add a small can (4 ounces) of diced green chili peppers if you want your curry to be spicy. Dona doesn't like spicy, so I left this out. Cook until the cauliflower is tender and remove from the heat.

In a small frying pan heat the oil until it shimmers. Add the cumin seeds and cook for 10 seconds, stirring. Add the garlic and saute until the garlic is slightly browned. The original recipe says this might take as long as a minute. Stir in the ginger and then pour/scrape this mixture into the curry. Add the lemon juice and, if you really like it hot, 1/4 teaspoon cayenne pepper.

Eat it as is or serve it over rice!

Monday, April 25, 2011

Lettuce Wraps


As I may or may not have told you, Dona is on a mostly vegetable and fruit diet. This presents some challenges, especially when I'm cooking for someone who doesn't really like vegetables all that much. Dona had this recipe for lettuce wraps that had mint and basil as well as bean sprouts. I don't have access to fresh mint or basil (hard to believe, living in rural Wyoming, the local grocery store doesn't carry those). So I improvised.

Lettuce Wraps
  • Romaine Lettuce
  • Bean sprouts
  • Asparagus
  • One Avocado
  • Carrots
I started by just using the whole lettuce leaf but the base doesn't really roll very well. Maybe I was doing it wrong. Anyway, I decided to cut off the lower three inches or so, and use it as part of the wrap. (For all of these pictures, I took the last wrap I made apart so I could show you what I did.)


Then, you just layer the different vegetables into the green end of the lettuce leaf. I started with the lettuce.


The avocado I sliced into 12 sections, and put two sections in each wrap. The avocado really gives some body and fullness of flavor to these.

Wednesday, April 20, 2011

Broccoli Cheese Soup


One of Samantha's and Cassaundra's favorite dishes that I make is this one. I don't make it a lot, and I'm not sure why because it is relatively easy, tastes good, and is probably good for you. At least, it has plenty of vegetables, so it should be good for you. The cheese and cream I used shouldn't negatively affect your diet, heh, heh.

Broccoli Cheese Soup
  • 2 cups chicken stock
  • 2 cup diced potato
  • 1/2 cup sliced carrots
  • 1/2 cup sliced celery
  • 1 head broccoli, separated into smallish florets
  • 1/2 cup chopped onion
  • 1/2 teaspoon salt ( I usually don't add salt to my recipes. There's salt in the butter and cheese)
  • 1/4 teaspoon pepper
  • 1/4 cup butter or margarine
  • 1/4 cup potato starch
  • 2 cups milk 
  • 8 ounces shredded sharp cheddar cheese
  • 3-4 slices American cheese (or Velveeta)
Put all of the vegetables and the pepper into the stock. Cover and simmer 10-12 minutes or until the vegetables are tender. (At this point you can puree the vegetables if you need to hide them from your kids or if you like smooth soup. If you don't have to hide the vegetables and like a chunky soup, leave everything as is.) Prepare a white sauce with the potato starch, and milk. Add the butter or margarine and allow to melt. Stir in the potato starch/milk mixture and keep stirring until it thickens. Especially if you use potato starch you have to make stir it. Potato starch gets sort of like snot if you just add it in and don't stir. Snot, as I'm sure you have noticed, doesn't taste good. Add the cheese and let it melt. Don't let the soup boil. Once the cheese is melted, you are ready!